
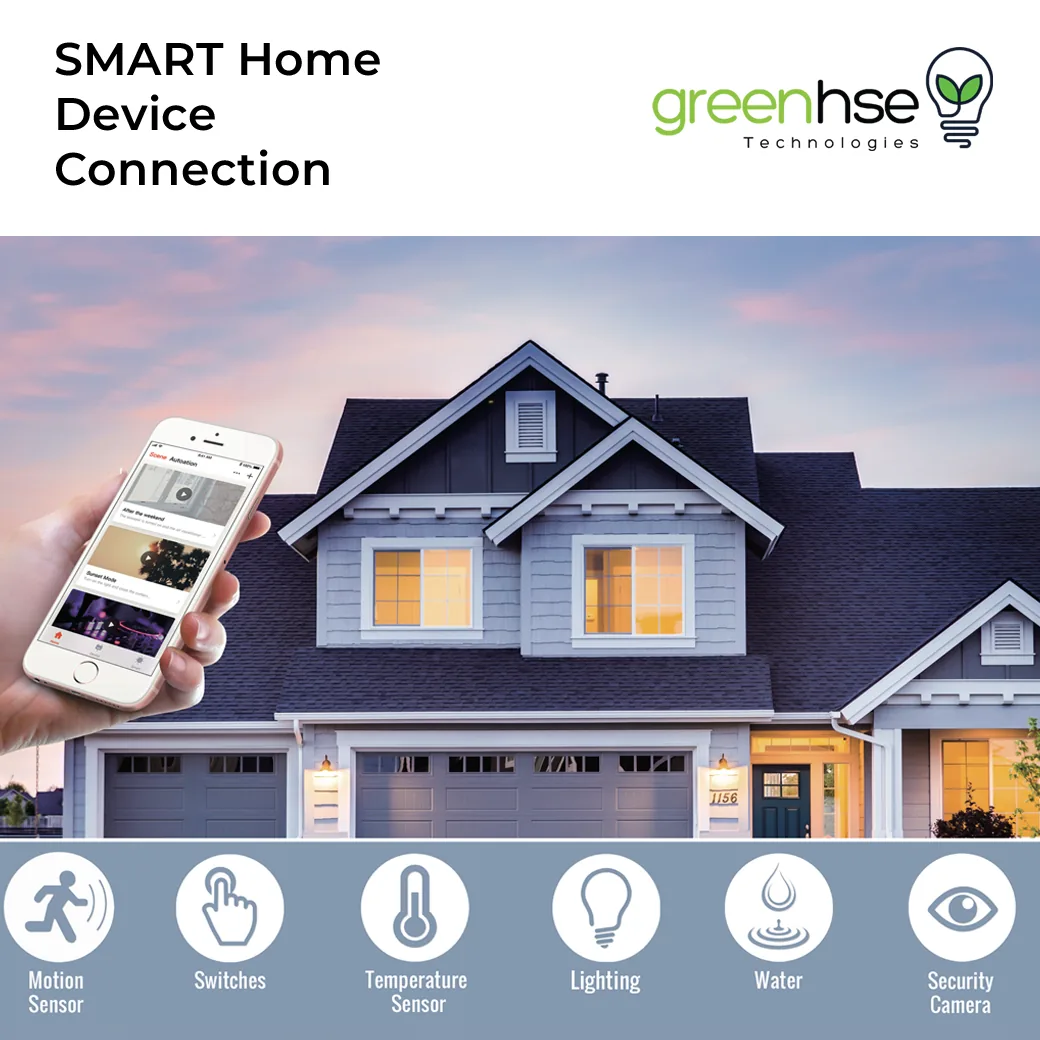
A smart home is an automated system that integrates the devices in your house, whether wired or wireless, so they can be controlled virtually from one app. That covers lights, fans, television, music system, sensors, cameras and more. Smart devices are very effective at saving energy costs, adding security, saving time and adding convenience, and they make the home more comfortable to live in.
Greenhse Technologies offers a range of smart home devices for Perth homes, including the Smart lighting products. This guide covers what to look for when buying smart devices, how to set up your router so they connect first time, and the step-by-step process for adding a device in the Tuya or Smart Life app.
Tips for purchasing smart devices
- Choose generic apps, not proprietary ones. Products on a widely supported platform such as Tuya or Smart Life work alongside many other devices. Proprietary apps can lock you into contracts, are often more expensive, and may not be available or supported in the future.
- Buy from local suppliers, or at least suppliers in Australia. Smart products that work in some countries are not guaranteed to work everywhere, and a local purchase comes with support, replacement and refund options.
- Not all smart items are the same, even when they share a name and look identical. Functions are sometimes limited to save cost, and output and specifications can be lower. A good smart plug offers remote switching, multiple timers, energy monitoring and countdown options, and can be triggered by other smart devices, sensors or switches. A proprietary plug may only connect to its own brand, have limited timer control and no energy monitoring.
- Check smart light functions. Quality smart lights offer warm to cool white and full-colour dimming, work with Alexa or Google, support timers and link to other devices. Basic models may have only simple functions and around one third of the brightness in full colour.
- Compare cameras carefully. Resolution, recording functions and sensor capability vary greatly between smart IP cameras, and some require ongoing monthly or yearly fees.
Smart device installation tips
The main cause of connection problems is a lack of understanding of the router and how it should be set up. The second is badly written and misleading instructions. The following sections deal with both.
Router (or modem) tips
The modem converts the internet signal from your service provider, and the router sends that signal to your devices over WiFi. Most routers are dual band, using both the 2.4GHz and 5GHz frequency ranges. Unfortunately most smart devices only work on 2.4GHz, so some changes to the router are often needed before devices can be added.
Log on to the router using the details on its label, for example the address 10.1.1.1 and the password admin (or a new password you chose earlier). Open the wireless settings and make sure there is a separate 2.4GHz network.
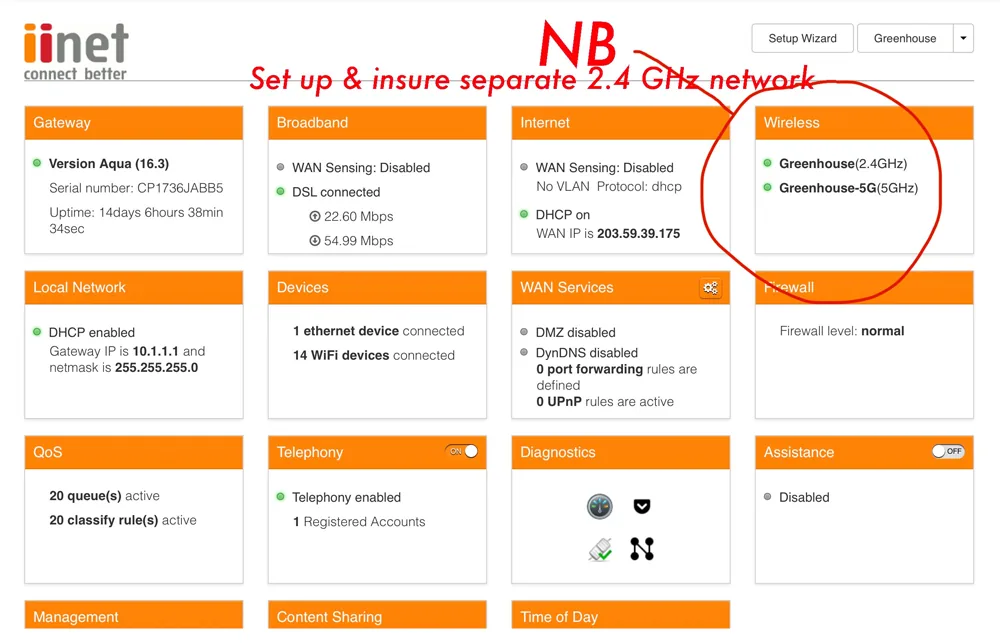
Note that 5GHz is not the same as 5G. The terms 2.4GHz and 5GHz refer to the operating frequency of the WiFi. 5G refers to the fifth generation of mobile network, which followed 4G and 3G, and does not describe a frequency, even though each generation uses different frequencies and wavelengths.
- If the router already has separate 2.4GHz and 5GHz networks with different names and passwords, select the 2.4GHz option (or the non-5GHz option) on your smartphone, then add the smart device using the same 2.4GHz name and password.
- If both bands share one name and password, log on to the router, split them into two separate names and passwords, and then select the 2.4GHz option on your phone.
Also read: How To Change 5GHz To 2.4GHz To Connect Smart Devices.
The smartphone and the smart device being added must both be on the same 2.4GHz network during setup. After that, connection is straightforward in most cases. The next most common issue is making sure the device is ready for pairing and that its indicator light is flashing correctly, as described in the app.
How to add your smart device in the app
Follow these six steps, shown in the screenshots below:
- Set the smartphone to 2.4GHz. In the phone's WiFi settings, join the 2.4GHz network (for example Greenhouse rather than Greenhouse-5G).
- Open the app and tap the plus symbol in the top right hand corner to add a device.
- Carefully select the device being added. Check first whether it is a WiFi, Bluetooth or Zigbee product, because each type is listed separately in the categories, such as Lighting, Electrical or Security and Sensors.
- Set or reset the device as per the app instructions. Typically you switch the device on, hold the reset button for 5 seconds, and confirm the indicator is blinking rapidly. Complete pairing within 3 minutes of the reset.
- Add to 2.4GHz. Enter the WiFi password for the 2.4GHz network. The app shows a tick beside 2.4GHz and a cross beside 5GHz as a reminder that only 2.4GHz networks are supported. Tap Confirm.
- Wait for a successful connection. Keep the router, phone and device as close together as possible while the app finds the device, registers it to the cloud and initialises it.
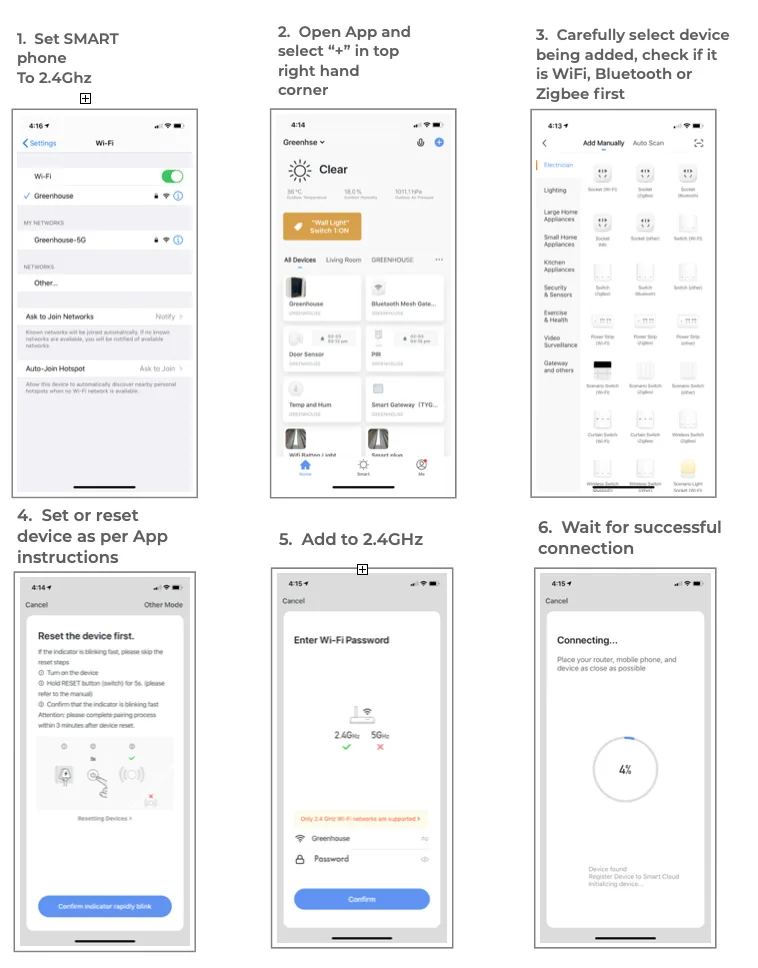
Once the device is added, rename it, assign it to a room and it will be ready for schedules, scenes and voice control through Alexa or Google.
Common connection problems
- Phone still connected to the 5GHz band, or both bands sharing one network name.
- Wrong WiFi password entered.
- Device not in pairing mode, or pairing timed out after 3 minutes.
- Device too far from the router during setup.
- Selecting the wrong device type (WiFi, Bluetooth or Zigbee) in the app.
Correct the cause, reset the device and repeat the steps. For help choosing or connecting smart devices, contact Greenhse Technologies in Perth on (08) 9297 2969 or visit the showroom at 5/1 Locke Lane, Ellenbrook WA 6069.
Shop the range