Working out how many lights a room needs, and where to put them, is one of the most common questions we hear from Perth homeowners and electricians planning a new build or renovation. Too few downlights leave dark corners, too many waste money and create glare. This guide sets out the basic lighting layout guidelines Greenhse Technologies uses when marking up a floor plan, room by room, together with the compatible LED downlights and ceiling lights we recommend for each room size.
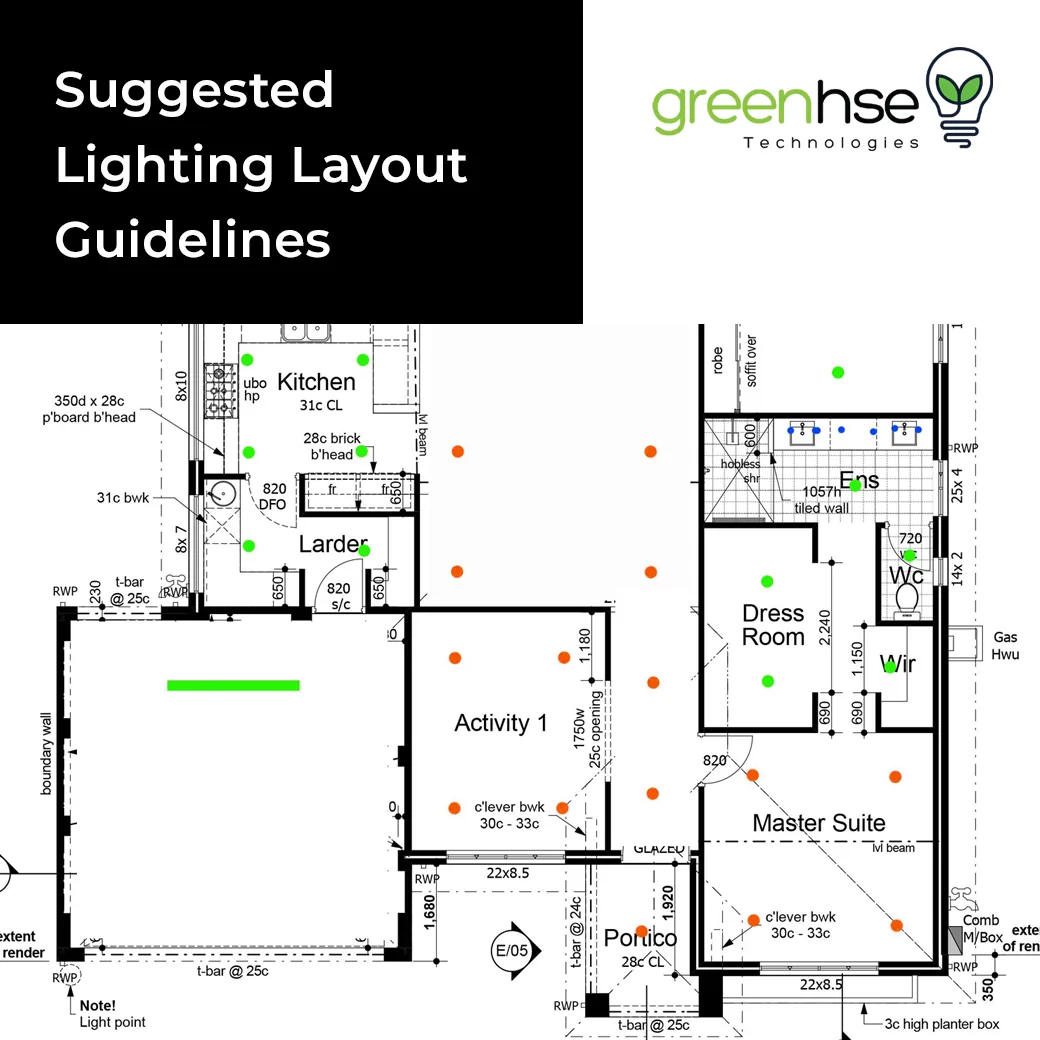
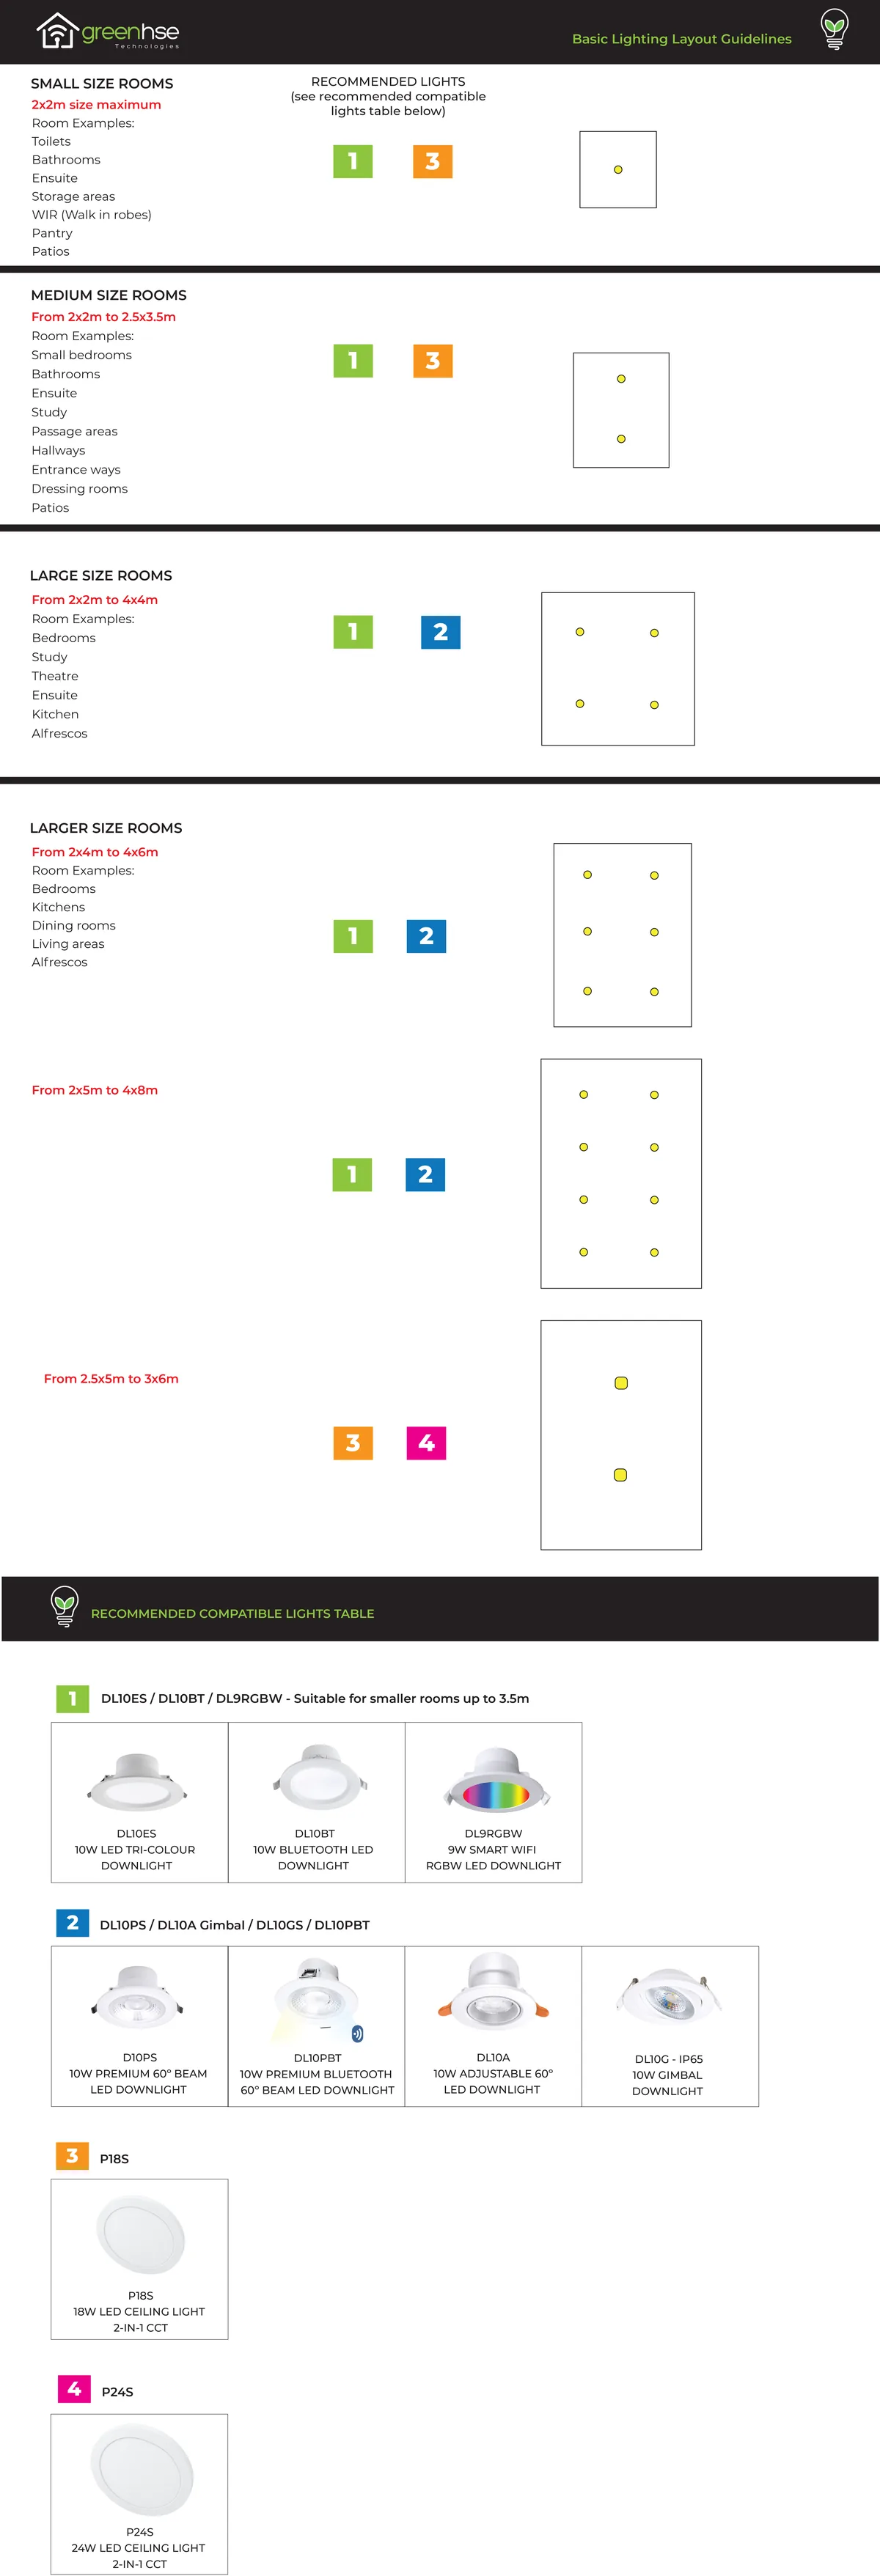
The two images below show the approach in practice: first a marked-up house plan with suggested light points, then a summary table of room sizes, layouts and recommended lights. The notes that follow explain how to read them and apply the same logic to your own plan.
Reading the floor plan
On the plan above, every dot is a suggested light point. Small rooms such as the larder, WC, walk-in robe and dressing room carry a single light in the centre of the ceiling. The kitchen has lights spaced along the bench run, the ensuite has a point over the vanity and another over the shower area, and the larger living, activity and master suite areas use a regular grid of four to eight points so the light overlaps evenly. The long green bar in the garage or alfresco area represents a linear fitting such as a batten or strip light rather than a downlight.
The principle is simple: light points are placed in a grid that matches the shape of the room, kept a consistent distance from the walls, and spaced so the beams overlap at working height. Furniture, benches and mirrors then decide where the grid shifts slightly so that task areas get direct light.
Room-by-room layout guide
Small rooms: up to 2m x 2m
Typical rooms are toilets, small bathrooms, ensuites, storage areas, walk-in robes, pantries and small patios. One light in the centre of the ceiling is enough. Recommended fittings are group 1 (DL10ES, DL10BT or DL9RGBW downlights) or group 3 (the P18S 18W ceiling light).
Medium rooms: 2m x 2m to 2.5m x 3.5m
Small bedrooms, bathrooms, ensuites, studies, passage areas, hallways, entrance ways, dressing rooms and patios fall into this bracket. Use two lights placed along the long axis of the room, each roughly a quarter of the way in from the short walls. Recommended fittings are again group 1 downlights or a group 3 ceiling light.
Large rooms: 2m x 2m to 4m x 4m
Bedrooms, studies, theatre rooms, ensuites, kitchens and alfrescos of this size suit a grid of four lights, one in each quarter of the ceiling. Recommended fittings are group 1 or group 2 downlights.
Larger rooms: 2m x 4m to 4m x 6m
Main bedrooms, kitchens, dining rooms, living areas and alfrescos of this size need a grid of six lights arranged in two rows of three. Recommended fittings are group 1 or group 2 downlights.
Long rooms: 2m x 5m to 4m x 8m
For long open-plan living and dining spaces, extend the grid to eight lights in two rows of four so that the spacing between points stays even from one end to the other. Recommended fittings are group 1 or group 2 downlights.
Rooms using ceiling lights: 2.5m x 5m to 3m x 6m
Where a surface-mounted oyster style light is preferred over downlights, a room of this size can be lit with two ceiling lights spaced along the long axis. Recommended fittings are group 3 (P18S) or group 4 (P24S).
Recommended compatible lights
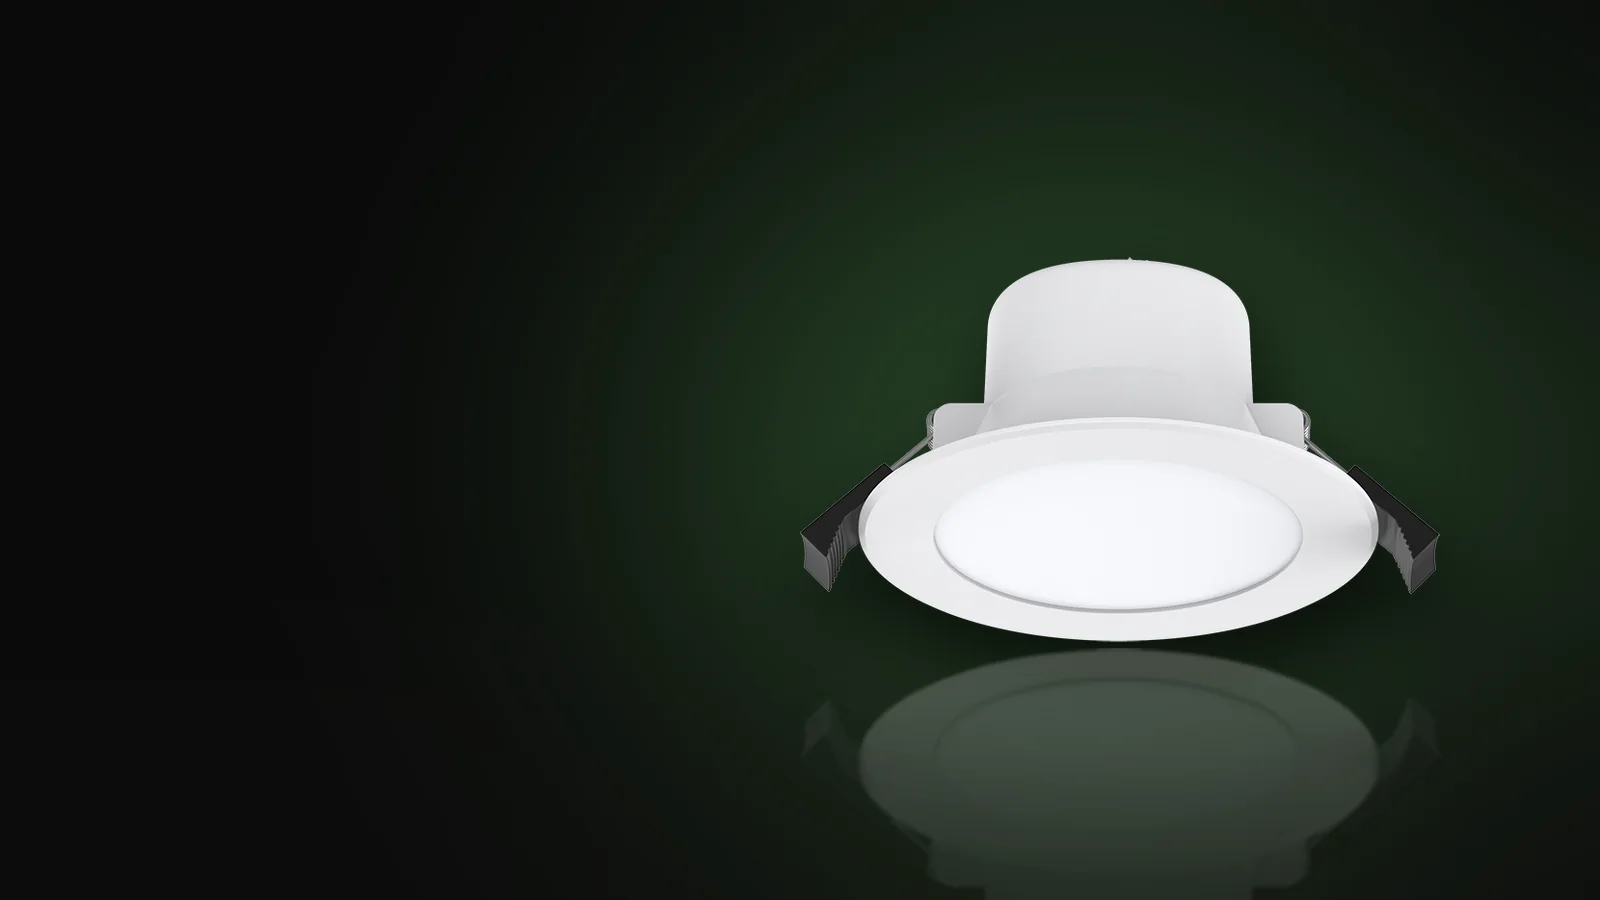
- Group 1: DL10ES, DL10BT and DL9RGBW. Suitable for smaller rooms up to 3.5m. The DL10ES is a 10W LED tri-colour downlight, the DL10BT is a 10W Bluetooth LED downlight, and the DL9RGBW is a 9W smart WiFi RGBW LED downlight for colour-changing scenes.
- Group 2: DL10PS, DL10A gimbal, DL10GS and DL10PBT. The DL10PS is a 10W premium 60 degree beam LED downlight, the DL10PBT is its 10W premium Bluetooth 60 degree beam version, the DL10A is a 10W adjustable 60 degree LED downlight, and the DL10G is an IP65 rated 10W gimbal downlight. These narrower 60 degree beams are the better choice in larger rooms and under higher ceilings because they push light down where it is needed with less side spill and glare.
- Group 3: P18S. An 18W LED ceiling light with 2-in-1 CCT, so the colour temperature can be selected at installation.
- Group 4: P24S. A 24W LED ceiling light with 2-in-1 CCT, for the larger rooms in the last bracket.
Practical tips when planning your layout
- Start with the room dimensions from your plan, match them to the closest size bracket above and mark the grid before you consider furniture.
- Keep light points a consistent distance from the walls so the wash across the ceiling looks even from the doorway.
- Over benches, vanities and desks, shift the nearest point so the beam lands on the work surface rather than behind your shoulder.
- In bathrooms, ensuites and alfrescos choose fittings with a suitable IP rating for damp areas, such as the IP65 gimbal.
- Tri-colour and CCT fittings let you settle on warm or cool white after the ceiling is finished, which avoids repainting decisions later.
- All downlight and ceiling light installation and wiring must be carried out by a licensed electrician.
These layout guidelines are a starting point rather than a rule book, and every home has its own quirks in ceiling height, natural light and room use. If you would like a second opinion on your plan, bring it to Greenhse Technologies in Perth. Our showroom at 5/1 Locke Lane, Ellenbrook WA 6069 has the full range of downlights and ceiling lights on display, or call (08) 9297 2969 and we will help you mark up a layout that suits your home.
Shop the range